How to Change a Tyre: A Safe Step-by-Step Guide for Drivers
Knowing how to change a tyre is one of the most useful skills every driver should have. A flat tyre can happen anywhere, on a busy road, in a parking area, during a long trip, or even close to home. While roadside assistance is helpful, there may be times when you need to handle the situation yourself safely and confidently.
Changing a tyre is not complicated, but it does require care, the right tools, and a proper step-by-step approach. If done incorrectly, it can be dangerous for you, your passengers, and other road users. This guide explains everything you need to know, from preparing your vehicle to fitting the spare tyre and checking safety before driving again.
Why Every Driver Should Know How to Change a Tyre
Many drivers rely completely on towing services or roadside assistance, but learning how to change a tyre can save time and stress in an emergency. If you are stuck in an area with poor phone reception or waiting times are long, being able to replace a flat tyre yourself can help you get moving again sooner.
This skill is especially important for people who travel long distances, drive at night, or regularly use highways and rural roads. Even if you do not change the tyre yourself every time, understanding the process helps you stay calm and make safer decisions when a tyre problem occurs.
Tools You Need Before Changing a Tyre
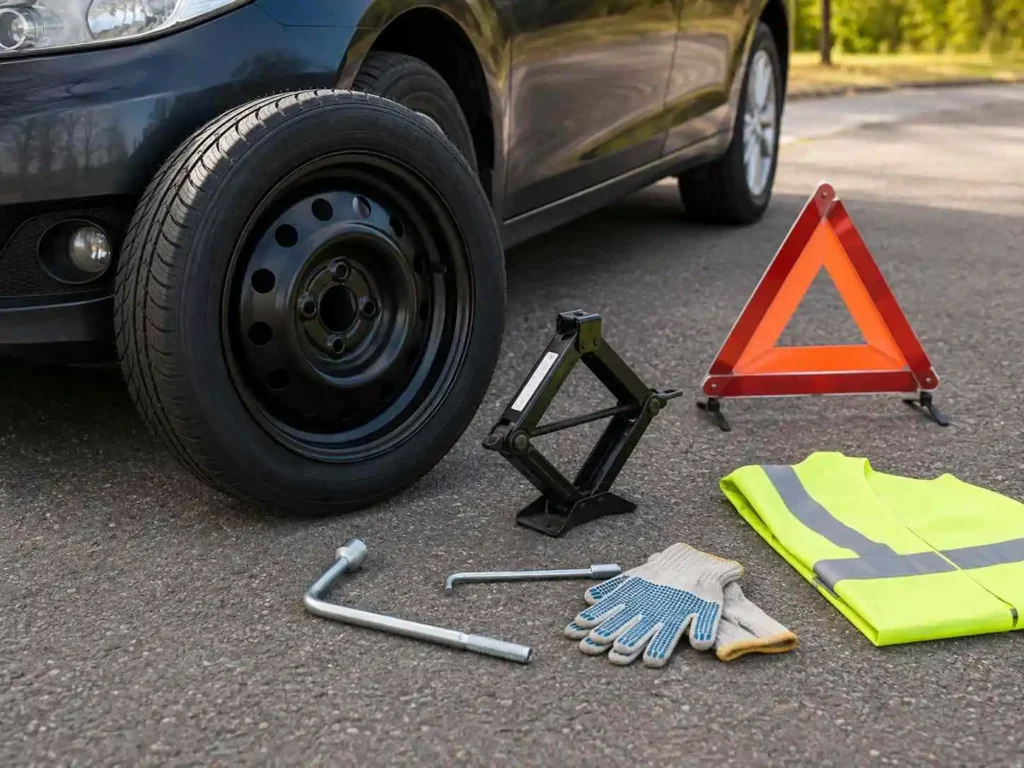
- Spare tyre in good condition with the correct tyre pressure.
- Vehicle jack suitable for your car.
- Wheel brace or lug wrench.
- Vehicle owner’s manual for the correct jacking points and instructions.
- Wheel wedges or blocks to prevent the vehicle from rolling.
- Protective gloves for a better grip and cleaner hands.
- Torch or flashlight for changing a tyre in low-light conditions.
- Reflective safety triangle to warn other road users.
- High-visibility safety vest for roadside safety.
- Regularly inspect your spare tyre for proper inflation and any signs of wear or damage before you need to use it.
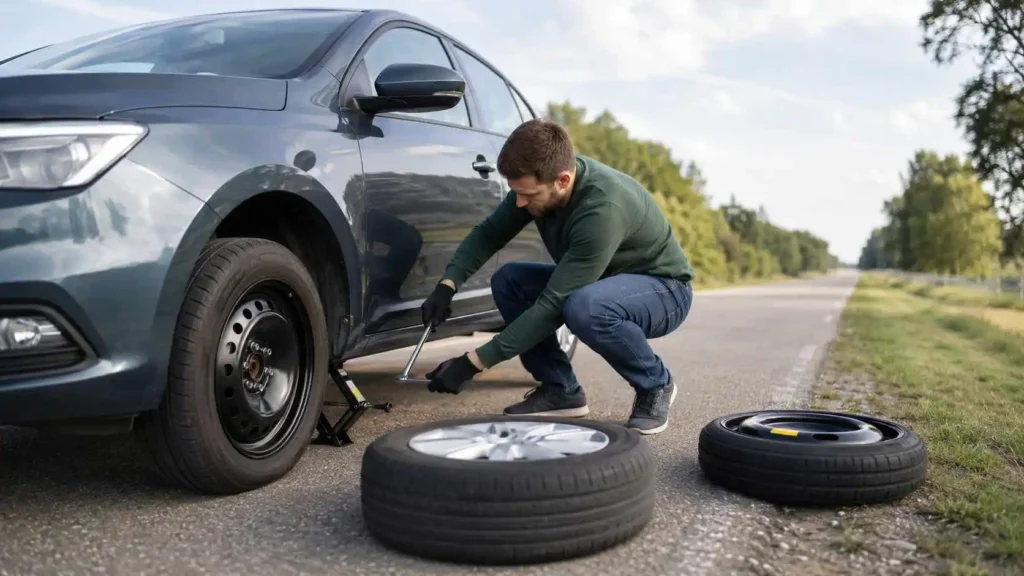
Step 1: Find a Safe Place to Stop
The first and most important step is safety. If you notice a flat tyre while driving, slow down gradually and avoid sudden braking. Turn on your hazard lights immediately so other drivers can see that something is wrong.
Look for a flat, stable, and safe area away from moving traffic. A car park, wide shoulder, side street, or service station is better than stopping in a dangerous location. Avoid changing a tyre on a curve, hill, soft ground, or narrow roadside if possible.
Once parked, turn off the engine, apply the handbrake, and put the car in park if it is automatic or in gear if it is manual. Ask passengers to stand in a safe area away from the vehicle and traffic.
Step 2: Prepare the Vehicle
Before lifting the car, prepare it properly. Place wheel wedges or solid blocks behind the tyres that will stay on the ground. This helps prevent the vehicle from rolling while it is raised on the jack.
Next, remove the spare tyre and tools from the boot. Check the owner’s manual if you are unsure where the jack points are located. Every car has specific lifting points designed to safely support the vehicle. Placing the jack in the wrong area can damage the car or cause it to slip.
If your wheels have a hubcap or wheel cover, remove it carefully before loosening the nuts. Some wheel covers can be pulled off by hand, while others may need the flat end of the wheel brace.
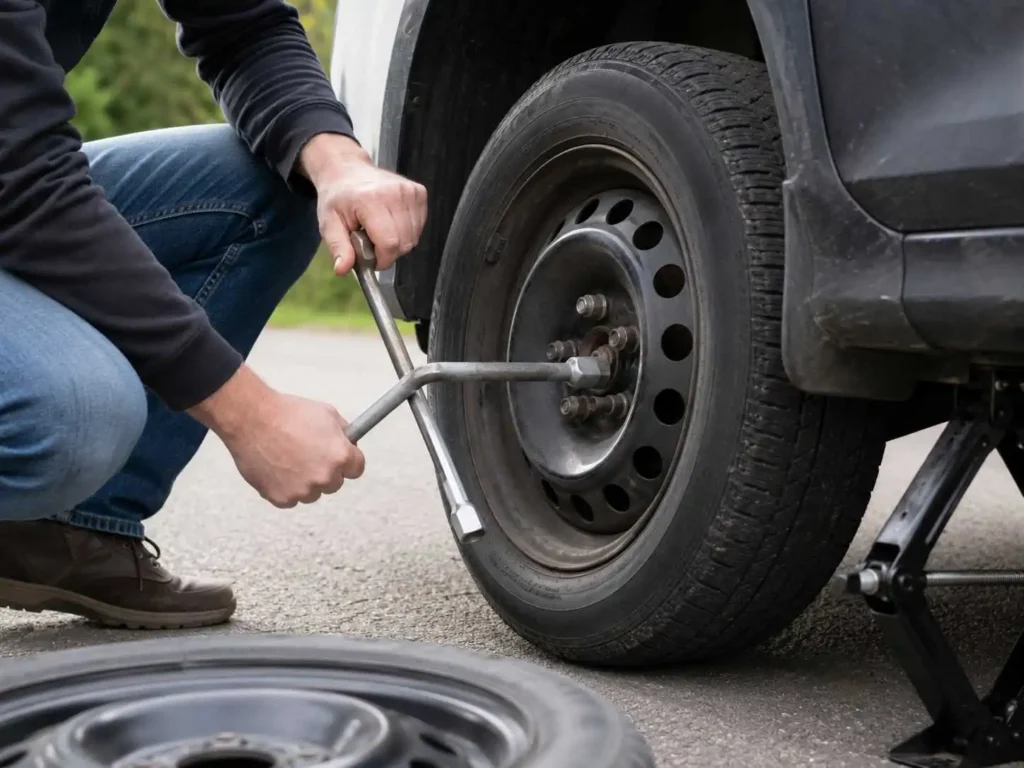
Step 3: Loosen the Wheel Nuts
Before lifting the car, loosen the wheel nuts slightly. Do not remove them completely yet. The tyre should still be touching the ground because this stops the wheel from spinning while you apply pressure.
Use the wheel brace and turn the nuts anti-clockwise. Some nuts may be tight, especially if they were fitted with power tools. Apply steady pressure rather than sudden force. If needed, carefully use your body weight, but avoid jumping on the wheel brace because it can slip and cause injury.
Loosen each nut about half a turn. This will make it easier to remove them fully once the vehicle is raised.
Step 4: Lift the Vehicle with the Jack
Now position the jack under the correct lifting point. Make sure it sits on firm, level ground. If the ground is soft, unstable, or uneven, do not continue unless you can move the car to a safer area.
Raise the vehicle slowly until the flat tyre is slightly off the ground. You only need enough space to remove the damaged tyre and fit the spare. Avoid placing any part of your body under the vehicle while it is supported only by the jack.
This is one of the most important parts of learning how to change a tyre safely. A jack is designed for lifting, not for long-term support, so work carefully and avoid unnecessary movement around the vehicle.
Step 5: Remove the Flat Tyre
Once the vehicle is raised, remove the loosened wheel nuts completely. Put them somewhere safe, such as inside the hubcap or in your pocket, so they do not roll away.
Hold the tyre firmly with both hands and pull it straight toward you. If it feels stuck, gently wiggle it from side to side until it comes loose. Do not force it aggressively, as sudden movement can affect the balance of the car on the jack.
After removing the flat tyre, lay it flat on the ground. Avoid standing it upright because it may roll away, especially if you are on a slight slope.
Step 6: Fit the Spare Tyre
Lift the spare tyre and align it with the wheel bolts. Push it carefully onto the hub until it sits flat against the mounting surface. Make sure it is properly aligned before replacing the wheel nuts.
Put the wheel nuts back on by hand first. Turn them clockwise and tighten them enough to hold the tyre in place. Do not fully tighten them while the vehicle is still raised, because the wheel may spin and the car may become unstable.
Tighten the nuts in a star pattern if possible. This helps the wheel sit evenly against the hub and reduces the chance of uneven pressure.
Step 7: Lower the Vehicle and Tighten the Nuts
Use the jack to lower the vehicle slowly until the spare tyre touches the ground. Once the car is stable, fully tighten the wheel nuts using the wheel brace.
Tighten the nuts firmly in a star or criss-cross pattern. This ensures balanced pressure around the wheel. After all nuts are tight, lower the car completely and remove the jack.
Check the wheel nuts one more time to make sure they are secure. If you are not confident they are tight enough, drive carefully to the nearest mechanic or service station and have them checked.
Step 8: Check the Spare Tyre Before Driving
After changing the tyre, take a moment to inspect the spare. Check if it looks properly fitted and has enough air pressure. Many spare tyres are temporary tyres, also known as space-saver tyres, and they are not designed for high speeds or long distances.
Read the instructions on the spare tyre or your vehicle manual. Temporary spare tyres often have speed and distance limits. Driving too fast or too far on a temporary spare can be unsafe and may damage your vehicle.
Put the flat tyre, tools, jack, and wheel cover back in the boot. Do not leave anything behind on the roadside.
Common Mistakes to Avoid When Changing a Tyre
- Changing a tyre too close to moving traffic instead of finding a safe location.
- Attempting to change the tyre in an unsafe area instead of calling roadside assistance.
- Placing the jack in the wrong lifting position, which can damage the vehicle or make it unstable.
- Forgetting to loosen the wheel nuts before lifting the vehicle.
- Failing to tighten the wheel nuts securely after installing the spare tyre.
- Driving at normal speeds or for long distances on a temporary spare tyre.
- Delaying the repair or replacement of the damaged tyre after fitting the spare.
When You Should Call Roadside Assistance
Changing a tyre yourself is useful, but it is not always the best option. You should call for help if you are on a busy motorway, in poor weather, on uneven ground, or in a location where you do not feel safe.
You should also call assistance if the wheel nuts are too tight, the spare tyre is damaged, the jack is missing, or you are unsure about any part of the process. Safety should always come first.
If your tyre burst caused damage to the wheel, suspension, or body of the car, do not continue driving until the vehicle has been checked by a professional.
How to Reduce the Risk of a Flat Tyre
While tyre problems cannot always be avoided, regular maintenance can reduce the risk. Check tyre pressure at least once a month and before long trips. Underinflated tyres can overheat and wear unevenly, increasing the chance of failure.
Inspect your tyres for cracks, nails, cuts, bulges, or low tread depth. Rotate your tyres as recommended by your vehicle manufacturer and replace them when they become worn.
Avoid driving over sharp objects, potholes, and road debris where possible. Good driving habits and regular inspections can help extend tyre life and improve road safety.
Final Thoughts on How to Change a Tyre
Understanding how to change a tyre gives you more confidence as a driver and helps you respond better during unexpected roadside situations. The process is simple when you follow the correct steps: stop safely, prepare the vehicle, loosen the nuts, lift the car, remove the flat tyre, fit the spare, tighten everything properly, and drive carefully afterward.
However, never put yourself in danger just to change a tyre. If the location is unsafe or you are unsure about the process, calling roadside assistance is the smarter choice. A spare tyre is only a temporary solution, so always repair or replace the damaged tyre as soon as possible.
By keeping your tools ready, checking your tyres regularly, and learning the correct method, you can handle a flat tyre safely and avoid unnecessary stress on the road.